Hey ABA Fam!
Today we’ll be making a Sensory St. Patricks day craft! Using just a few everyday items, we will make our very own lucky rainbows. Pot o’ gold not included.
This craft is a great way to celebrate St.Patricks day with children on the autism spectrum.
Benefits of Sensory Crafts
Sensory crafts are great for kids of all ages and abilities, but they can yield particularly good results in neurodivergent children, like those on the autism spectrum. Parents of Autistic children know that many of them experience sensory inputs differently than normal children. Typically, sensory sensitivities manifest in one of two forms: “hypersensitivity” which refers to the experience of more heightened and intense sensory inputs, and “hyposensitivity” which refers to the experience of reduced sensory inputs.
Children with hypersensitivity can use crafts to practice sensory tolerance. Crafts offer a safe environment in which to try interacting with new inputs and discover more about their likes and dislikes.
Children with hyposensitivity may love the unique textures, smells, and colors involved in these crafts. Crafts give them a safe environment in which to explore sensory extremes.
Crafts are also a great opportunity for children to practice fine motor skills. Learn how to safely use a variety of tools, including their own hands, wrists, and fingers!
We strongly encourage parents to get involved in these projects with their kids from start to finish. Give your child instructions and help lead them through the different steps of the project. This helps enforce ideas of “first, then” and can help them complete future projects on their own. You can also engage your child in conversation about their crafts: which colors do they like using? Which textures feel best? Where are you going to put this felt ornament? Every moment provides an opportunity for learning and growing together.
Craft Video
Follow along with the video below to make your rainbow!
What You’ll Need
- Paper Plate
- String
- Scissors
- Green Construction Paper
- Rainbow Markers
- Cotton balls
- glue
- Hole punch
Step-by-Step Guide
Here’s how to make your very own rainbow step-by-step.
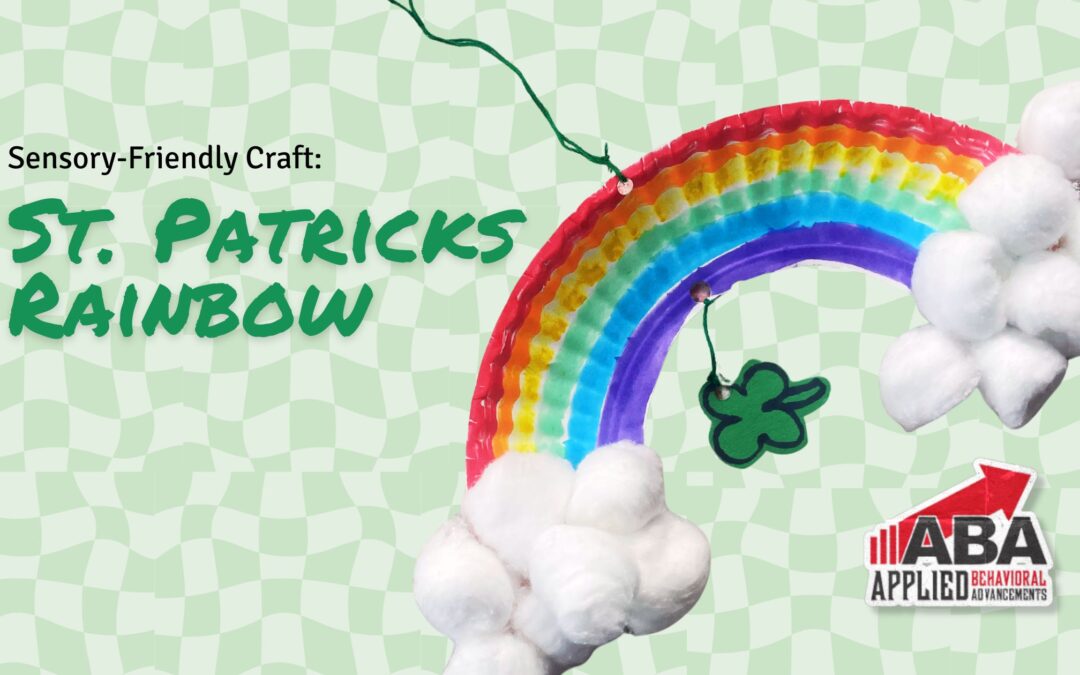
- Cut your paper plate in half.
- Cut around the inner rim of the paper plate to create a “rainbow” shape.
- Color your rainbow! This is a great opportunity to encourage your learner to practice putting colors in rainbow order. Remember Roy G. Biv?
- Punch holes in the middle of the rainbow – one on the top and one on the bottom.
- Use glue and cotton balls to create “clouds” in the corners of your rainbow.
- Draw a clover (about to 1-2″ inch tall), then cut it out and punch a hole in the top
- Use your string to attach the clover to your rainbow
- Create a loop through the top of your rainbow then knot it.
About ABA-LLC
ABA-LLC is one of the largest suppliers of Behavior Support in the State of Kentucky. Since 2007, the agency has created innovative strategies to improve the lives of unique individuals. ABA-LLC works with around 190 contractors, each dedicated to building an inclusive culture that celebrates individuals of all abilities. No matter who you are, you can reach your goals at ABA-LLC.
ABA-LLC is set apart from its competitors by its uniquely person-centered approach. The agency strives to provide services from a place of deep love for the population they serve. Their work exemplifies the belief that every individual has a right to live a fulfilling and independent life integrated within their communities. There is no objective to change a person, but rather to give them the tools they need to succeed. B.F. Skinner summarizes this vision in his quote: “I’m not trying to change people. All I want is to change the world in which they live.” Learn more about us at https://aba-llc.com/